Using OneWare Studio's Camera Tool
OneWare Studio has a Camera Tool that makes it possible to record images directly in OneWare Studio. It also has a Live Preview, where you can test a trained model on live images from a connected camera. You can even use the Camera Tool as a quality control station.
Adding and configuring cameras
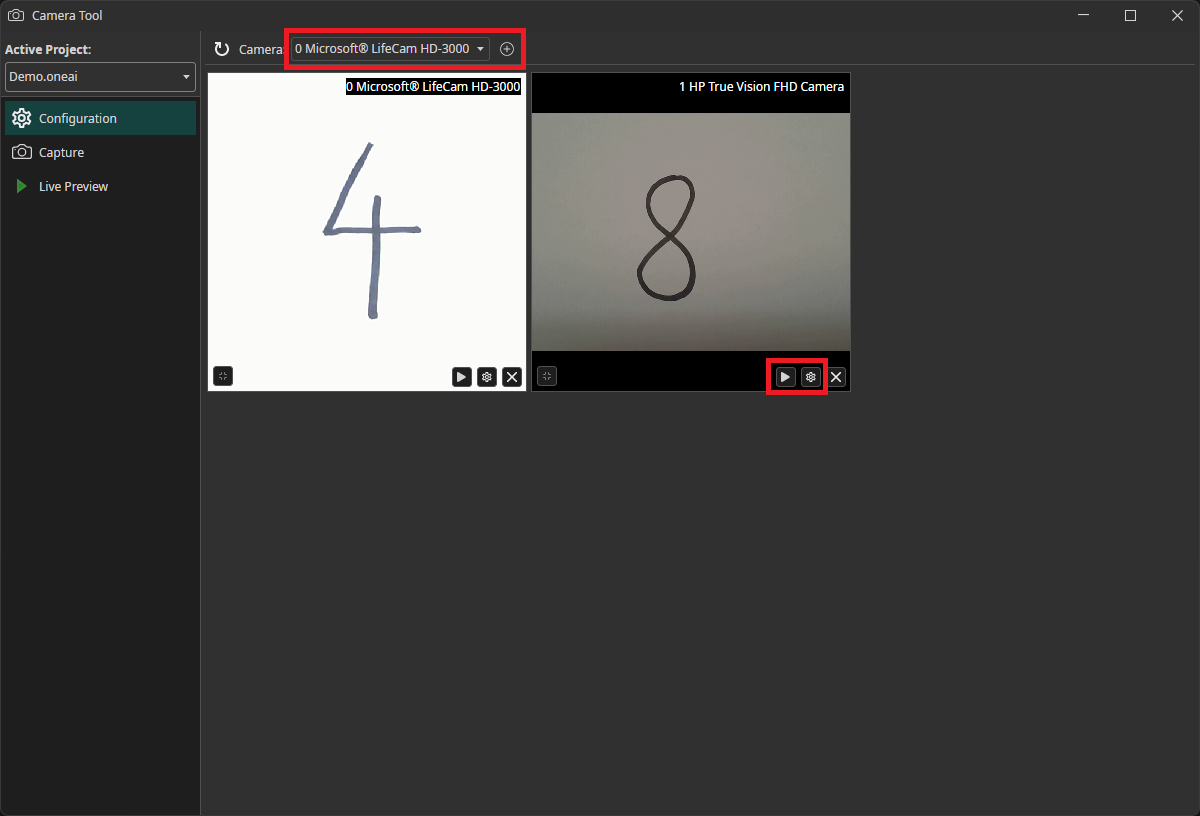
You can access the Camera Tool by clicking on AI in the menu bar and selecting Camera Tool. After you started the Camera Tool, you need to add the cameras to your workspace. Select the camera that you want to use in the dropdown menu and click on the plus icon. You can add more than one camera to record multiple images simultaneously. By clicking on the play icon on the bottom of the camera window you can start and stop the live preview of that camera. To enter the camera configuration menu, you need to click on the gear icon.
The camera configuration menu allows you to customize your camera settings. In the example in the image below, we increased the the camera's brightness and contrast. This brightens the white background and makes it easier for the AI model to recognize the numbers. You are also able to crop the image. You can draw the area you are interested in onto the preview or set its coordinates at the bottom of the settings list.
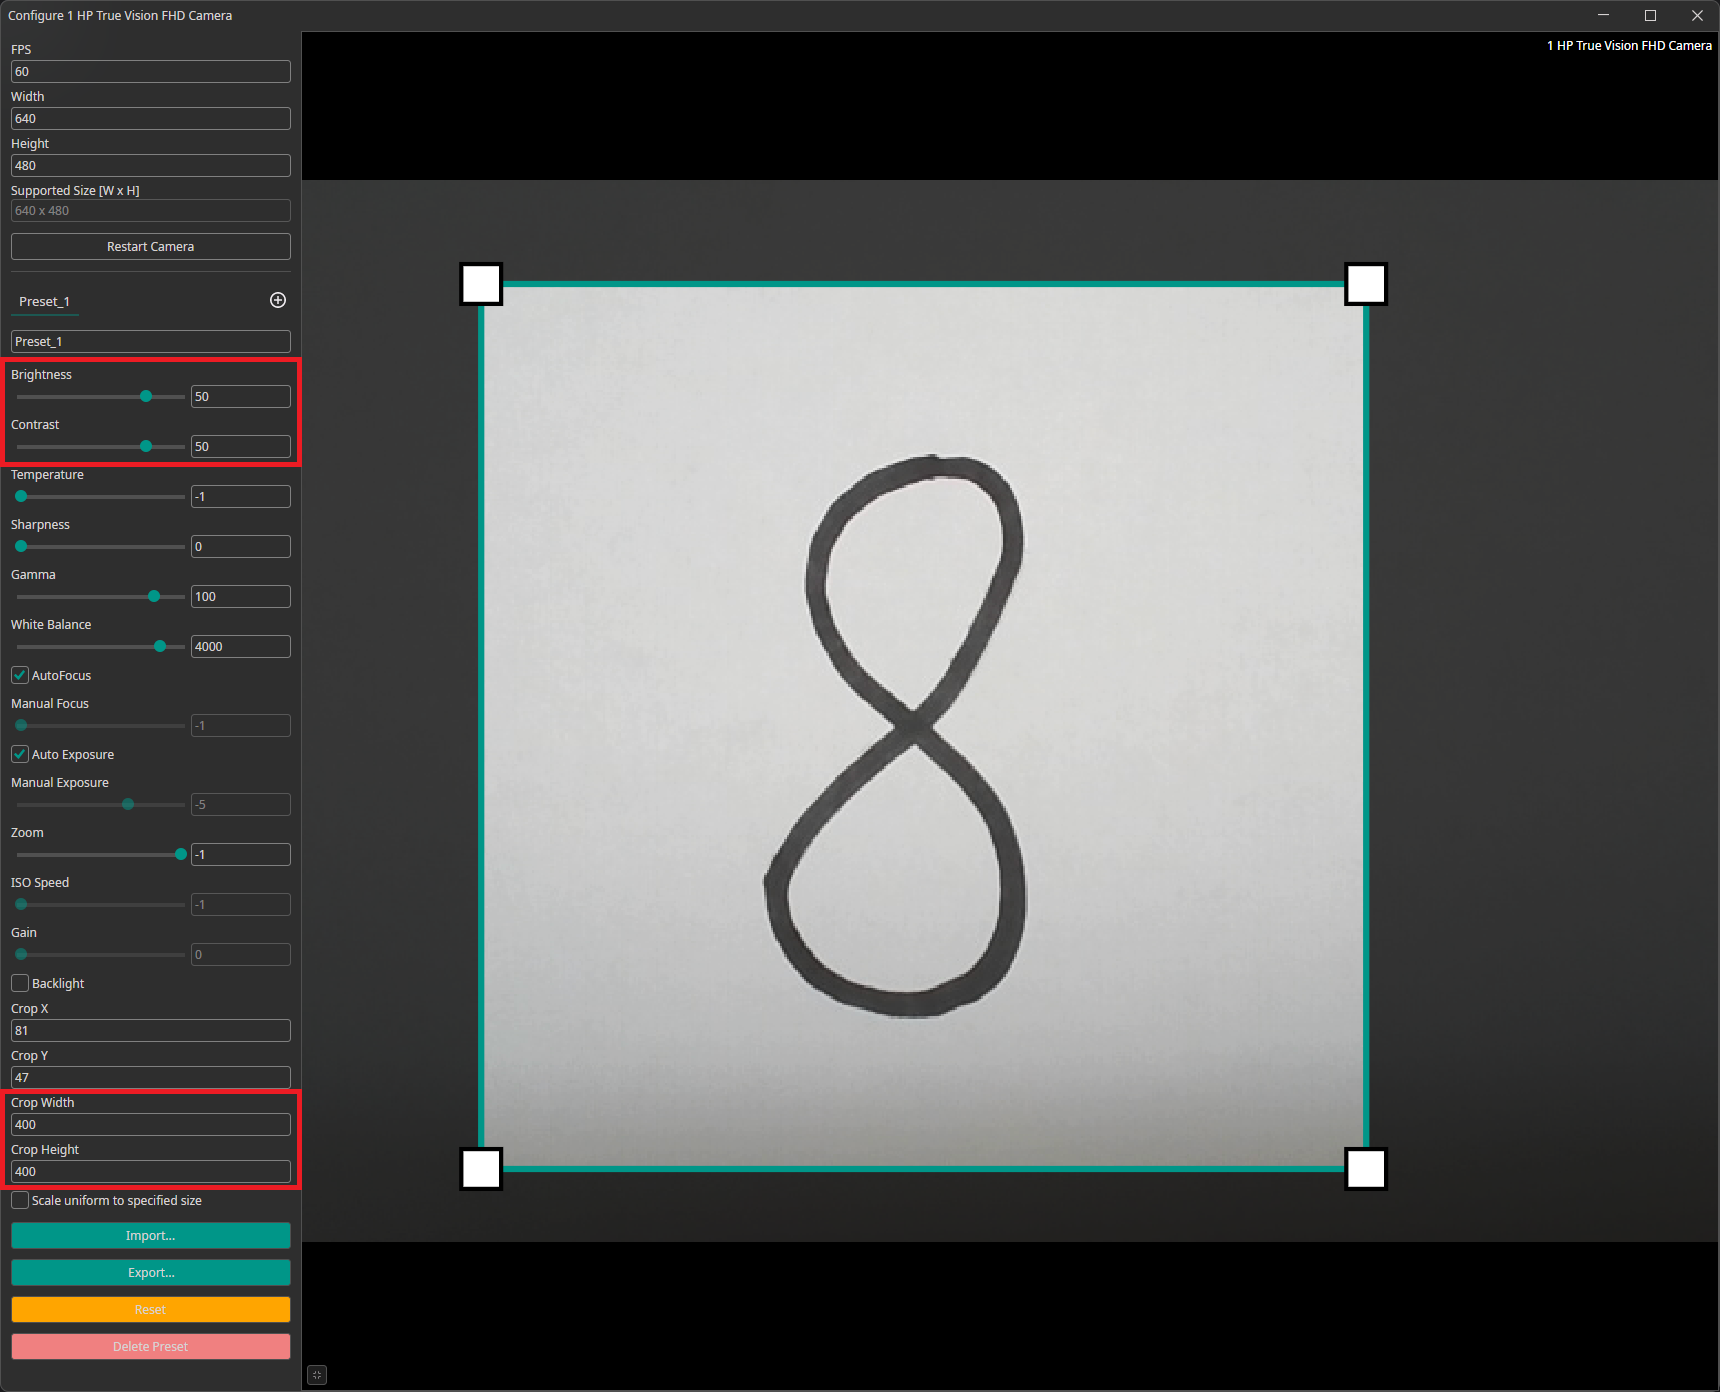
You can create presets with different settings that can be exported and imported. This makes it easy to test out and share different settings. If the camera settings contain multiple presets, the Capture tool will record one image for each preset. You can use this to create multiple crops for the same image and record all of them with a single click.
Capturing data
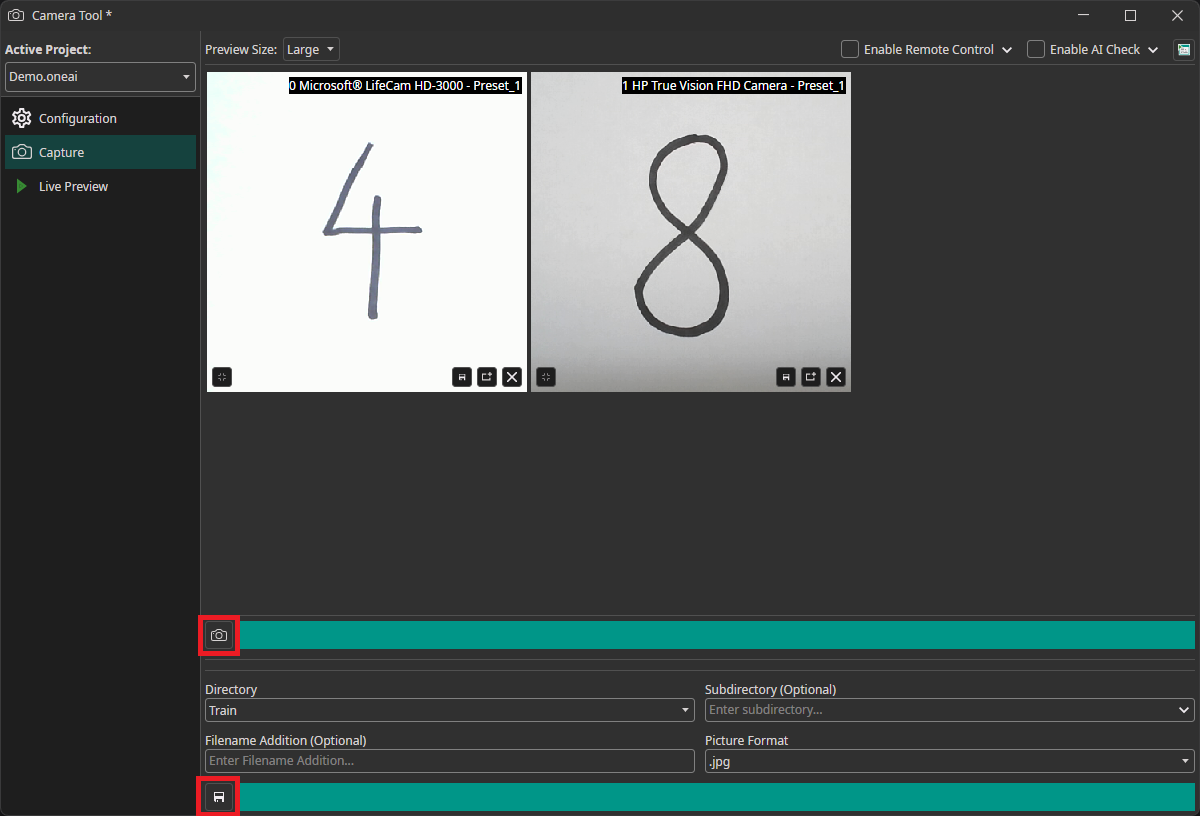
To record images, you need to go to the Capture tab. You can record images by clicking on the camera icon. This records an image from all cameras simultaneously and updates the preview. You need to select whether you want to add the image to the train, test or validation directory and click on the save icon to save them. The images are automatically named with the timestamp they were captured at, so you don't need to enter names manually. You have the option to add the images to a subdirectory and to add a suffix to the filename.
Using an AI model to generate labels
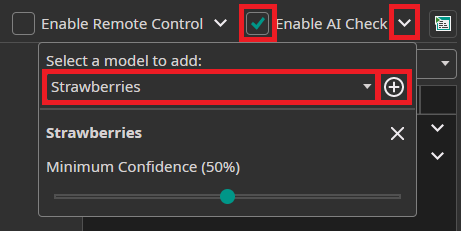
You can use an existing AI model to label the captured images as you record them. To do so, you need to export the trained model as an ONNX model. After downloading it, the model becomes available in OneWare Studio automatically. Next, you need to activate Enable AI Check in the top-right corner and select the model you want to use. After adding the model with the plus icon, you can select the Minimum Confidence that the model needs to have in a prediction for it to be used.
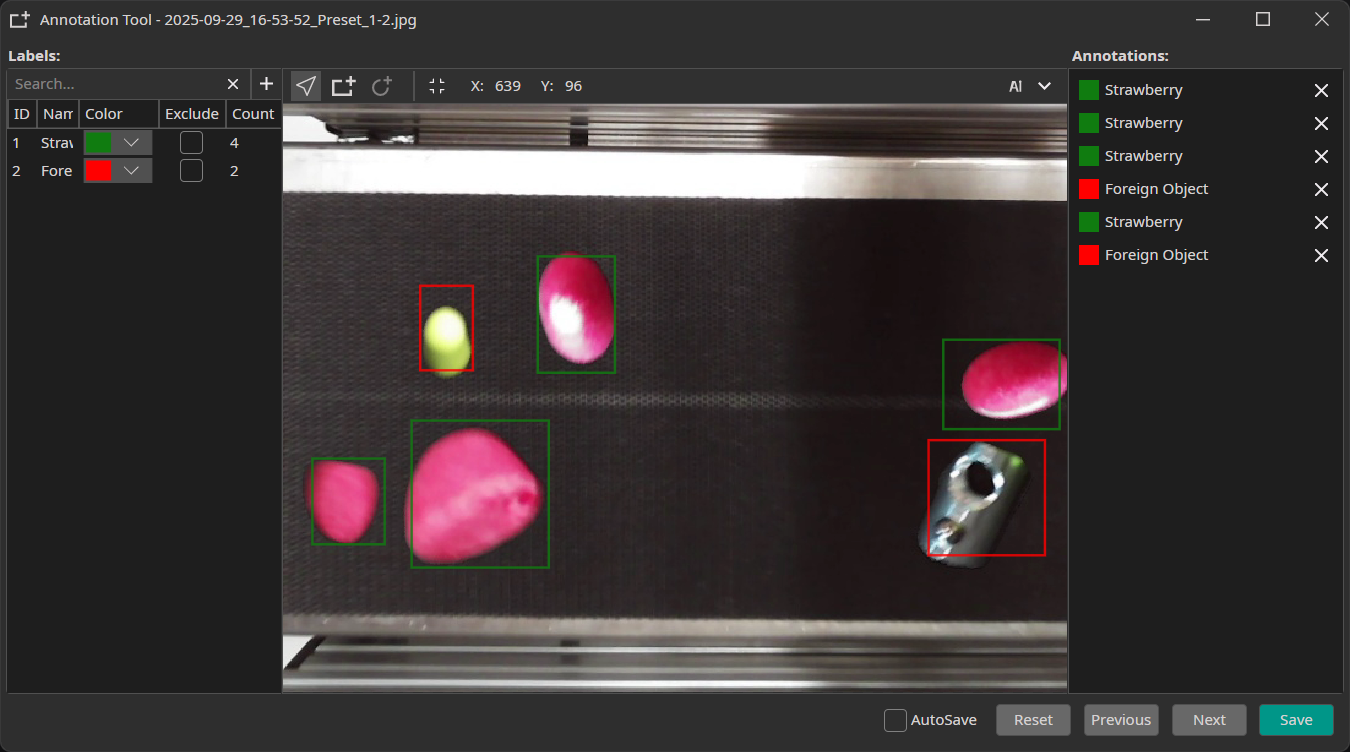
The predictions aren't visible in the preview, but you can view them in the Annotation Tool by clicking on the button between the save and the close icon.

Here, you can also correct any mistakes that were made by your model.
Using the camera tool as a quality control station
The Camera Tool can be used as a simple quality control station. To do so, you need to select an AI model like in the previous section. You can add rules that specify when an image passes the quality control in the label list. For each object, you can specify ranges for the allowed number of objects and the allowed total size. For example, you can specify that a product passes inspection if there is a single, small nick but fails if there are multiple nicks or any other defects. In addition, you can compute weighted sums of the object counts and sizes and add rules for them as well. With the dropdown menu on the top right, you can select whether you want to use the ruleset for all cameras or just one individual camera.
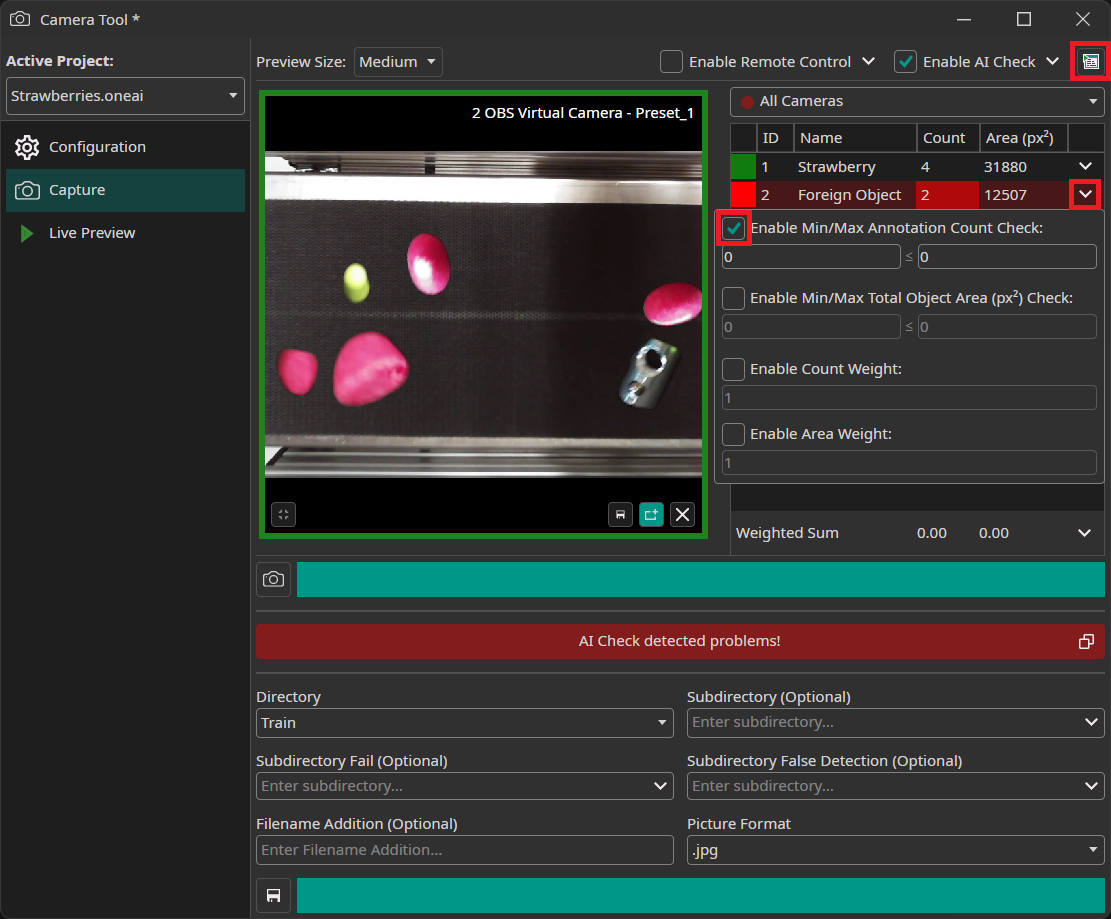
In the above image, we added the rule that an image fails the AI check if at least one foreign object is visible. Since there are two foreign objects, we get a red warning. You might wonder why the image has a green border. This is because we only configured a ruleset for All Cameras and not the individual camera. Since the check for the individual camera is passing, its border is green instead of red.
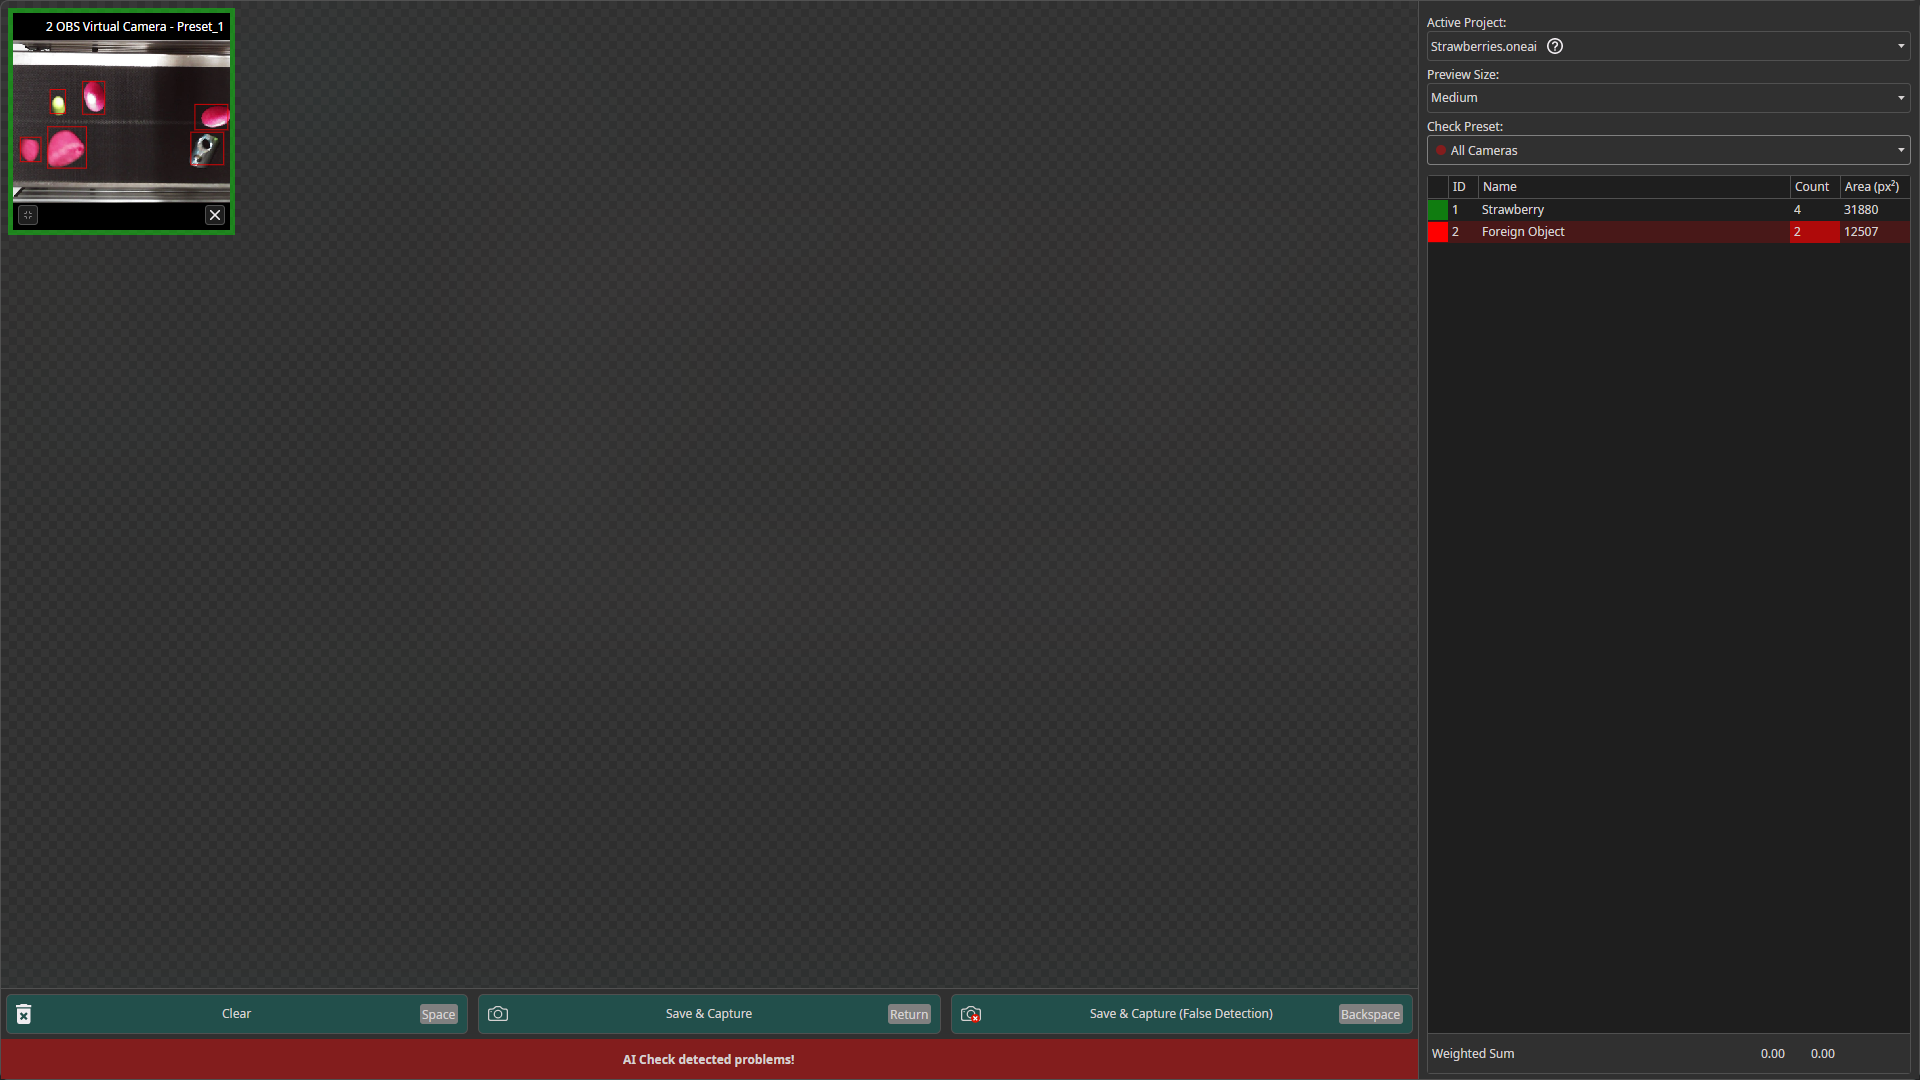
If you want to use the AI check in a production line, you might prefer the fullscreen mode. You can access it by clicking on the icon in the top-right corner that was marked in the previous image. Here, you have hotkeys for the different actions and can view the predictions directly in the preview.
You might have noticed that additional subdirectory options appeared in the Capture tab after you enabled the AI check. The field Subdirectory Fail allows you to specify a subdirectory that is used when the AI check fails. The field Subdirectory False Detection is used in the fullscreen mode where your operators can save images with false detections in a separate subdirectory for further evaluation.
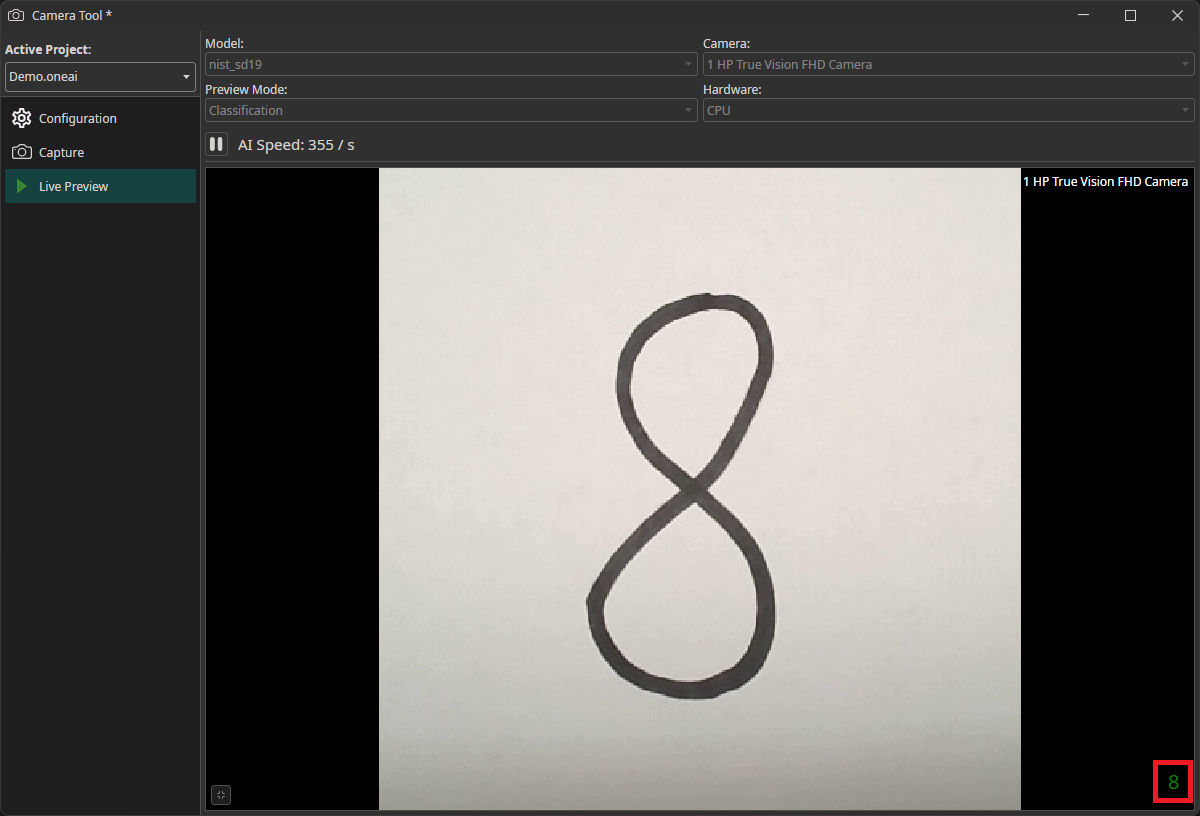
Testing models with the live preview
You can also use the Camera Tool to evaluate the performance of your model on live data. Like in the previous section, you need to export and download your model in the ONNX format. In the Live Preview tab, you can select the model that you want to use as well as the camera. You also need to select whether you are using a Classification or an Object Detection model in the Preview Mode. After you click on the play button, the model will start running on your local machine. If you have an object detection task, the predicted bounding boxes will be drawn directly onto the preview. For classification tasks, the predicted class is displayed in the bottom right corner.