Handling your Dataset
Before you start training your model, you need to load and organize your image data. A clean and well-labeled dataset is the foundation for accurate AI performance.
1. Load your images
Access the Dataset tab in your ONE AI workspace to prepare your visual training data.
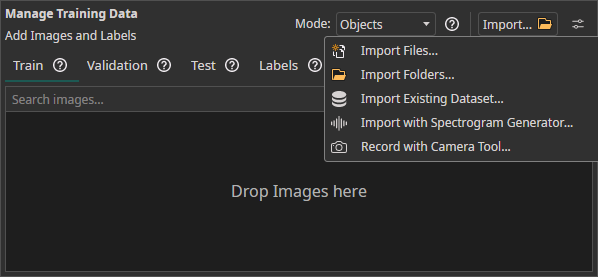
- You can simply drag and drop your image files to import them.
- You can
Import FilesorImport Foldersto load unlabeled image data directly from your device. - The
Import Datasetfeature can be used to load a labeled dataset. - You can use the
Camera Toolin theAItab to capture images directly within ONE AI for real-time data collection. - You can use the
Spectrogram Generatorto convert audio or time series data to images.
1.1 Dataset import
When you press the Import Existing Dataset button, the following window opens:
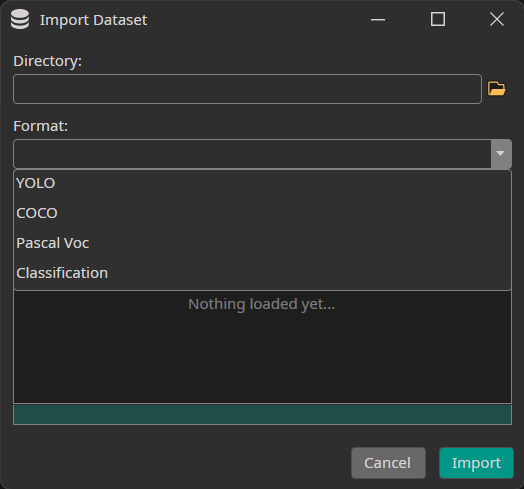
You need to select the directory to import as well as the format of your annotations. Currently, we support the formats YOLO, COCO and Pascal Voc as well as Classification datasets that contain one directory for each class.
If you want to try ONE AI but don't have a dataset, you can check out our examples:
1.2 Camera tool
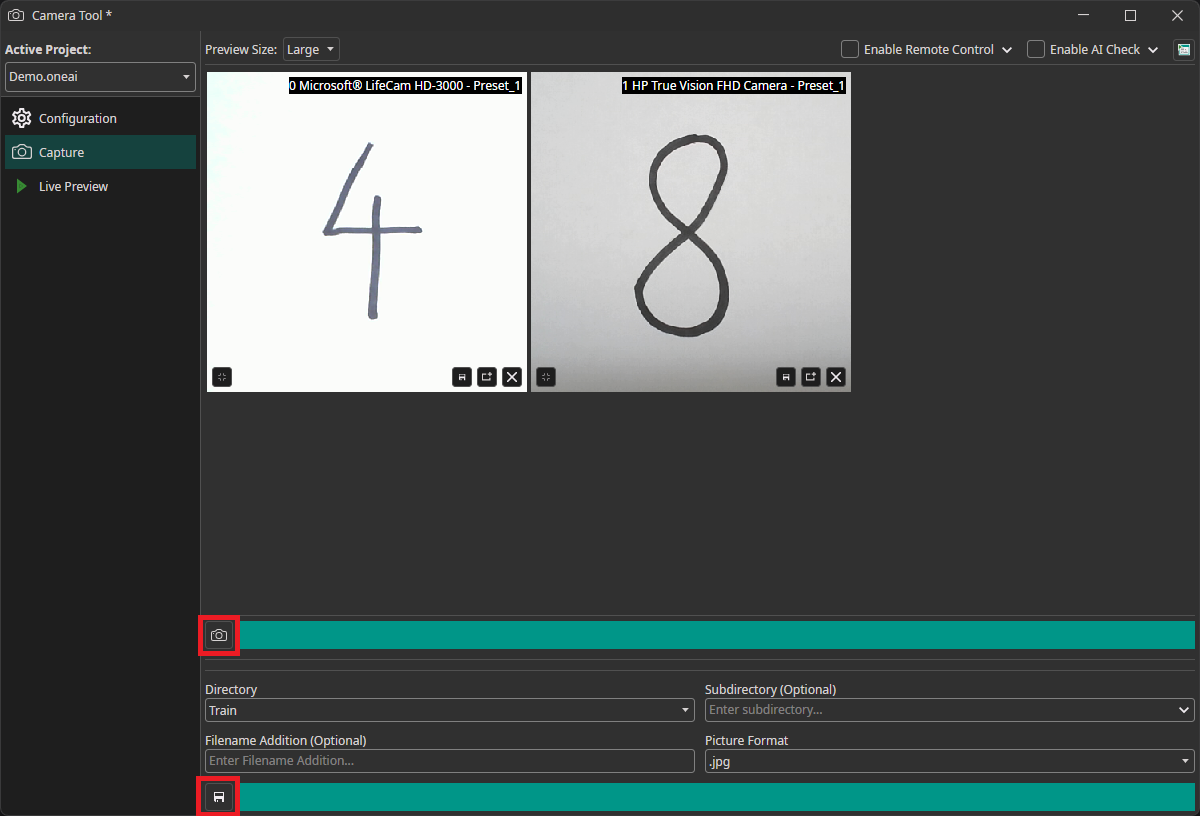
You can use OneWare Studio's integrated Camera Tool to record images for your dataset. The camera tool allows you to configure camera settings and record images from multiple cameras simultaneously. After adding and configuring your cameras in the Configuration tab, you need to switch to the Capture tab. Here, you can record images with the camera button and save them by clicking on the save icon below. The images are automatically named with the timestamp they were captured at, so you don't need to enter names manually.
If you want to learn more about the Camera Tool, you can check out this guide.
For computer vision use cases where viable training data is not available at the scale required because of edge cases, rare objects, or sensitive information / consumer privacy concerns, customized synthetic data generation can be a much faster, less expensive, and more diverse alternative to manual real data collection. If this is a current challenge for your team, explore our partner Rendered.ai for rapid synthetic image data generation to quickly access a clean, well-labeled dataset customized to your use case to train your model with ONE AI.
1.3 Spectrogram generator
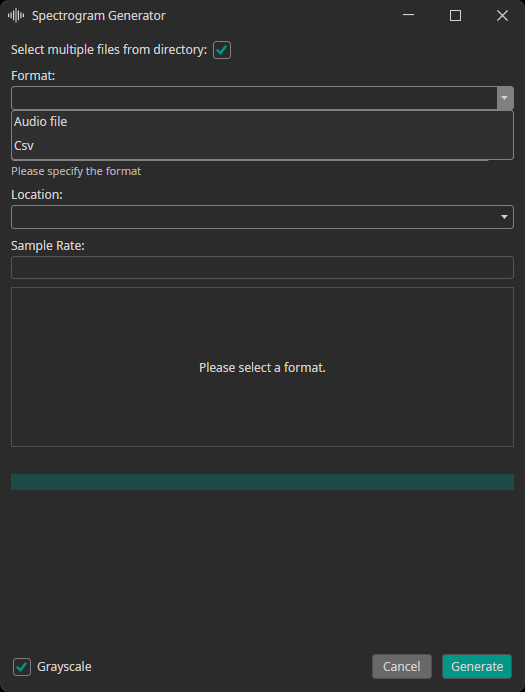
The spectrogram generator supports converting audio or CSV files to spectrogram images. You can decide, whether the generated spectrograms are added to the train, test or validation dataset. Furthermore, you need to provide the sampling rate of your data.
2. Choose the labeling mode

Classes: Each image is assigned to one or more classes.Objects: Individual objects are selected in the images by drawing boxes around them.
3. Divide your dataset
Dividing your data into separate subsets is crucial for building reliable AI models. Follow these steps to split your data effectively.
3.1 Training set
The training set teaches your AI what to recognize - it's your model's foundation.
Use about 70% of your total dataset with properly labeled images. Ideally it should include at least 50 images per class. More variety means better real-world performance.
3.2 Validation set
The validation set monitors your model's performance on unseen data during training.
This evaluates performance without direct training involvement. Labels are required for the validation set as well to monitor the AI performance on unseen data while training.

Using Validation Split: If you don't have separate validation images, you can enable Use Validation Split to auto-divide your training set:
- 20% for standard datasets
- 30% for small datasets
- 10% for large datasets
3.3 Test set
The test set provides a final performance evaluation after training. It is important to keep this set completely separate from training and validation data to get an objective evaluation. Providing labels is optional but highly recommended. Otherwise, you need to manually look through the predictions instead of getting a quantitative result.
To get an accurate evaluation on how the model will perform for your application, it is important to ensure that the test data represents the real-world deployment conditions. This organized approach ensures your AI model will be robust, accurate, and ready for real-world deployment with ONE AI.
If you don't have a separate test dataset, you can use the images from the train or validation dataset to test your AI. Because ONE AI only uses the validation dataset to stop the training when there is no more improvement and not for hyperparameter settings, the results should not be too far off, if you use the validation dataset for the final evaluation.

4 Add your labels
Open the Labels tab and create labels for each class you want to detect, e.g. "defect" or "strawberry". You can assign unique colors to make the annotation process faster and easier.
4.1 The two label modes
-
Classes: Assign classes to entire images.
Example: "defective" or "non-defective" for quality control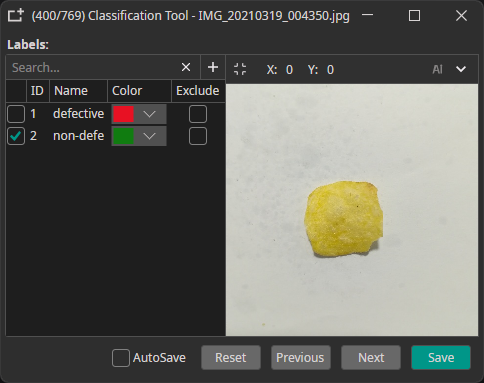

-
Objects: Mark specific objects by drawing bounding boxes. It is possible to annotate multiple objects and labels per image.
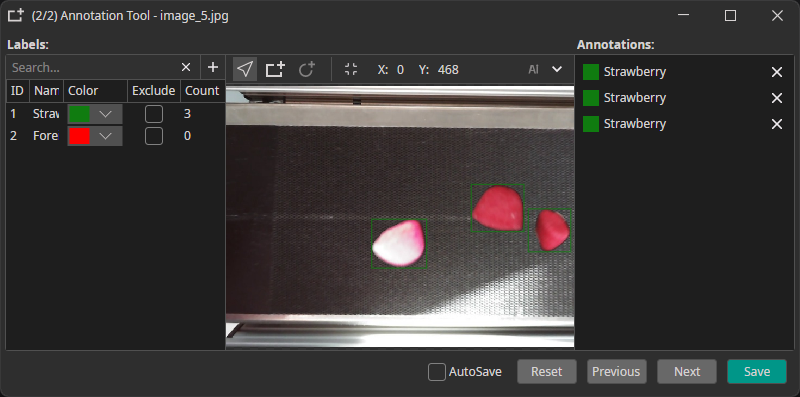
Example: individual boxes for "Strawberry" or "Foreign Object"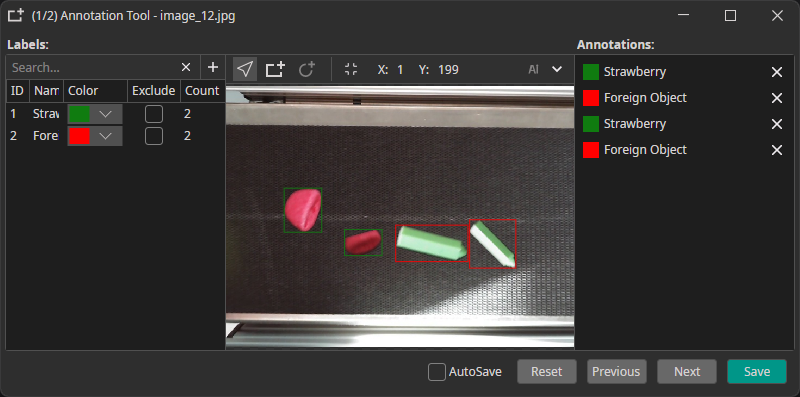
5 Using a trained model to annotate new data
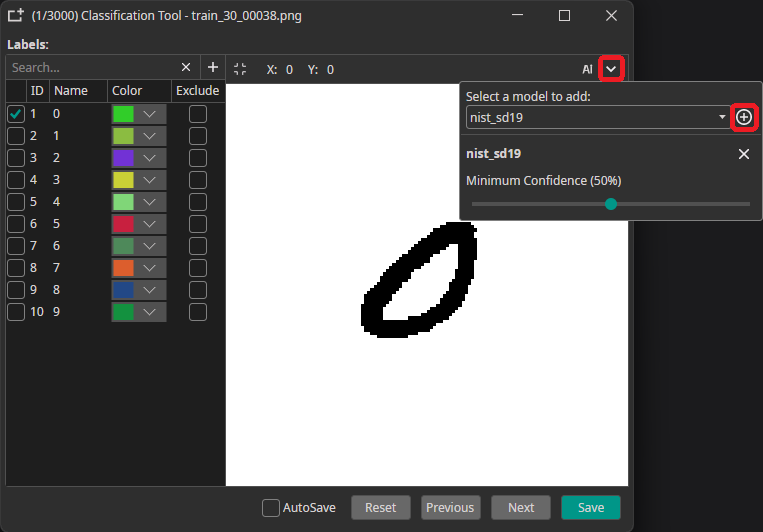
You can use a trained model to predict the annotations for new images, which greatly speeds up the annotation process. To use this feature, you need to export and download your trained model as an ONNX model. Next, you go to the Dataset tab and click on an image to open the annotation tool. There, you click on the arrow in the top-right corner, select your model and click on the plus icon. Here, you can also configure a Minimum Confidence that is required for the predictions to be applied. Only classes and objects whose predicted confidence exceed this setting are added to the annotations.
To predict the annotation for the current image, you need to click on the AI button in the top-right corner. This automatically applies the prediction, but you can discard it by pressing the Reset button. If the model makes a wrong prediction you can correct it afterwards, which still might be faster than doing the annotation completely manually.
One common approach for speeding up the annotation process is to only annotate a part of the dataset manually. This data is used to train a model, which in turn is used to aid in the annotation of the remaining data. Depending on the size of your dataset you might even repeat these steps multiple times to improve the predicted annotations as the model is trained with more and more data.