Configuration
Adding and configuring cameras
You can access the Camera Tool by clicking on AI in the menu bar and selecting Camera Tool. After you started the Camera Tool, you need to add the cameras to your workspace. Select the camera that you want to use in the dropdown menu and click on the plus icon. You can add more than one camera to record multiple images simultaneously. By clicking on the play icon on the bottom of the camera window you can start and stop the live preview of that camera. To enter the camera configuration menu, you need to click on the gear icon.

The camera configuration menu allows you to customize your camera settings. In the example in the image below, we adjusted the white balance. This brightens the white background and makes it easier for the AI model to recognize the numbers. You are also able to crop the image. You can draw the area you are interested in onto the preview or set its coordinates at the bottom of the settings list by clicking on the Change Crop button.
You can also configure a uniform resize (by height or width) that will be applied to captured images. Note that this resize setting won't be visible in the camera preview. You will only see the resized dimensions when you capture images in the Capture tool.
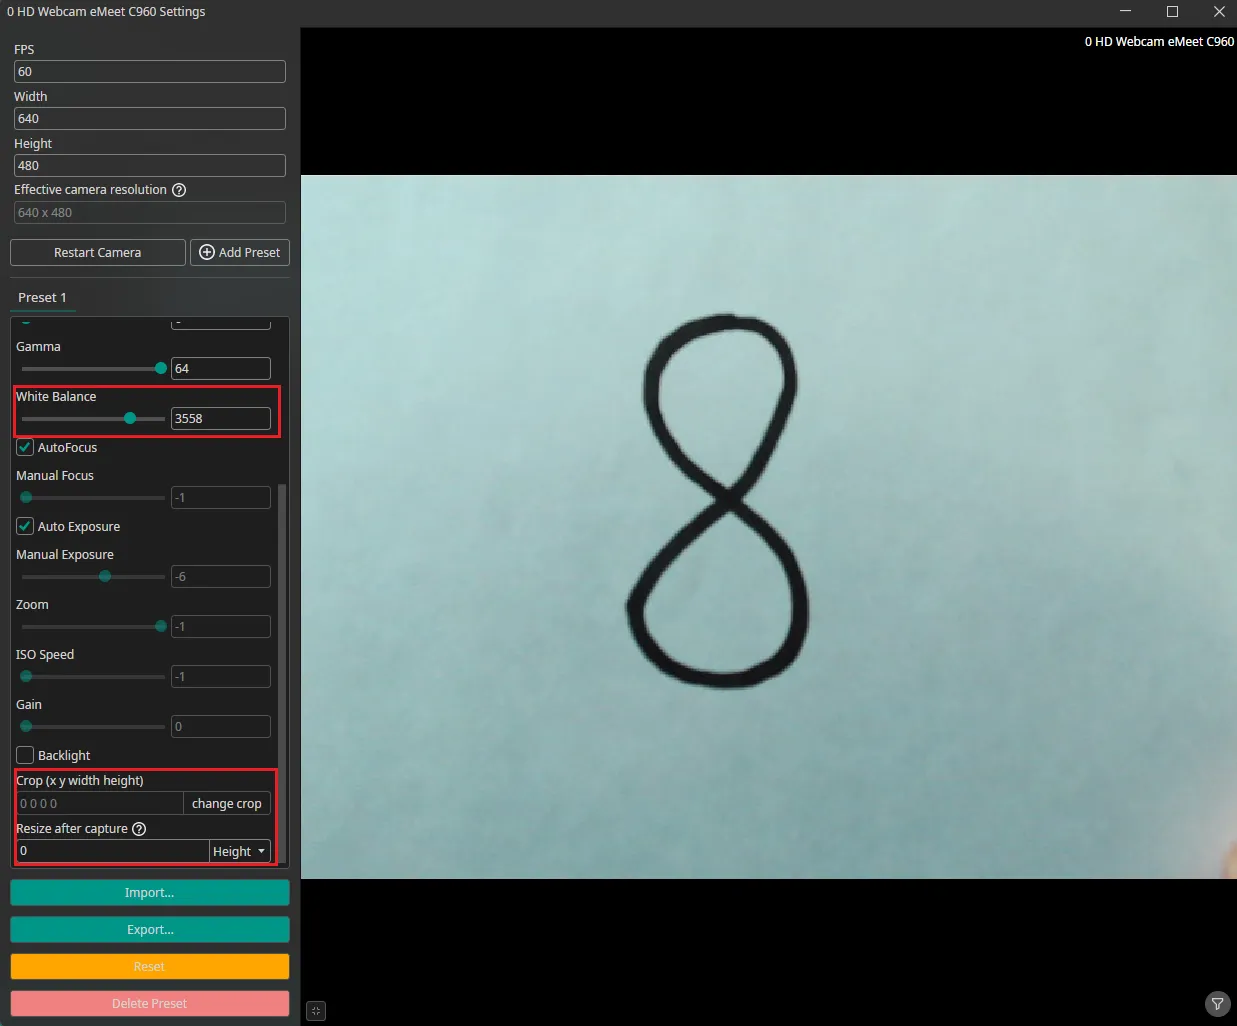
You can create presets with different settings that can be exported and imported. This makes it easy to test out and share different settings. If the camera settings contain multiple presets, the Capture tool will record one image for each preset. You can use this to create multiple crops for the same image and record all of them with a single click.
You can also add a simulated camera when clicking on the Add simulated camera button on the upper right of the window. If you already have a dataset, you can simulate a camera that goes through your existing dataset with the configured FPS. This is helpful when you want to try out your trained model fast in the live preview instead of clicking through single images or if you want to apply the AI check with a rule.