Capturing
Capturing data
To record images, you need to go to the Capture tab. You can record images by clicking on the Capture Button with camera icon. This records an image from all cameras simultaneously and updates the preview showing thumbnail previews before saving. You need to select whether you want to add the image to the train, test or validation directory and click on the save icon to save them. The images are automatically named with the timestamp they were captured at, so you don't need to enter names manually. You have the option to add the images to a subdirectory and to add a suffix to the filename. You can also use "Save All" to save all captured images in the session at once.

Using an AI model to generate labels
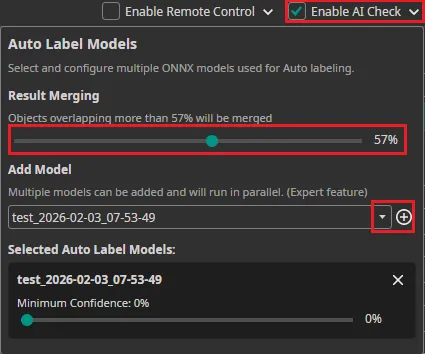
You can use an existing AI model to label the captured images as you record them. To do so, you need to export the trained model as an ONNX model. After downloading it, the model becomes available in OneWare Studio automatically. Next, you need to activate Enable AI Check in the top-right corner and select the model you want to use. After adding one model (or multiple models) with the plus icon, you can select the Minimum Confidence that the model needs to have in a prediction for it to be used. The Result Merging slider sets the threshold that determines if new predictions from the model are shown in case there is an overlapping already existing bounding box. During capture, AI predictions are executed automatically on each image and written as annotation files (.txt) alongside the images.
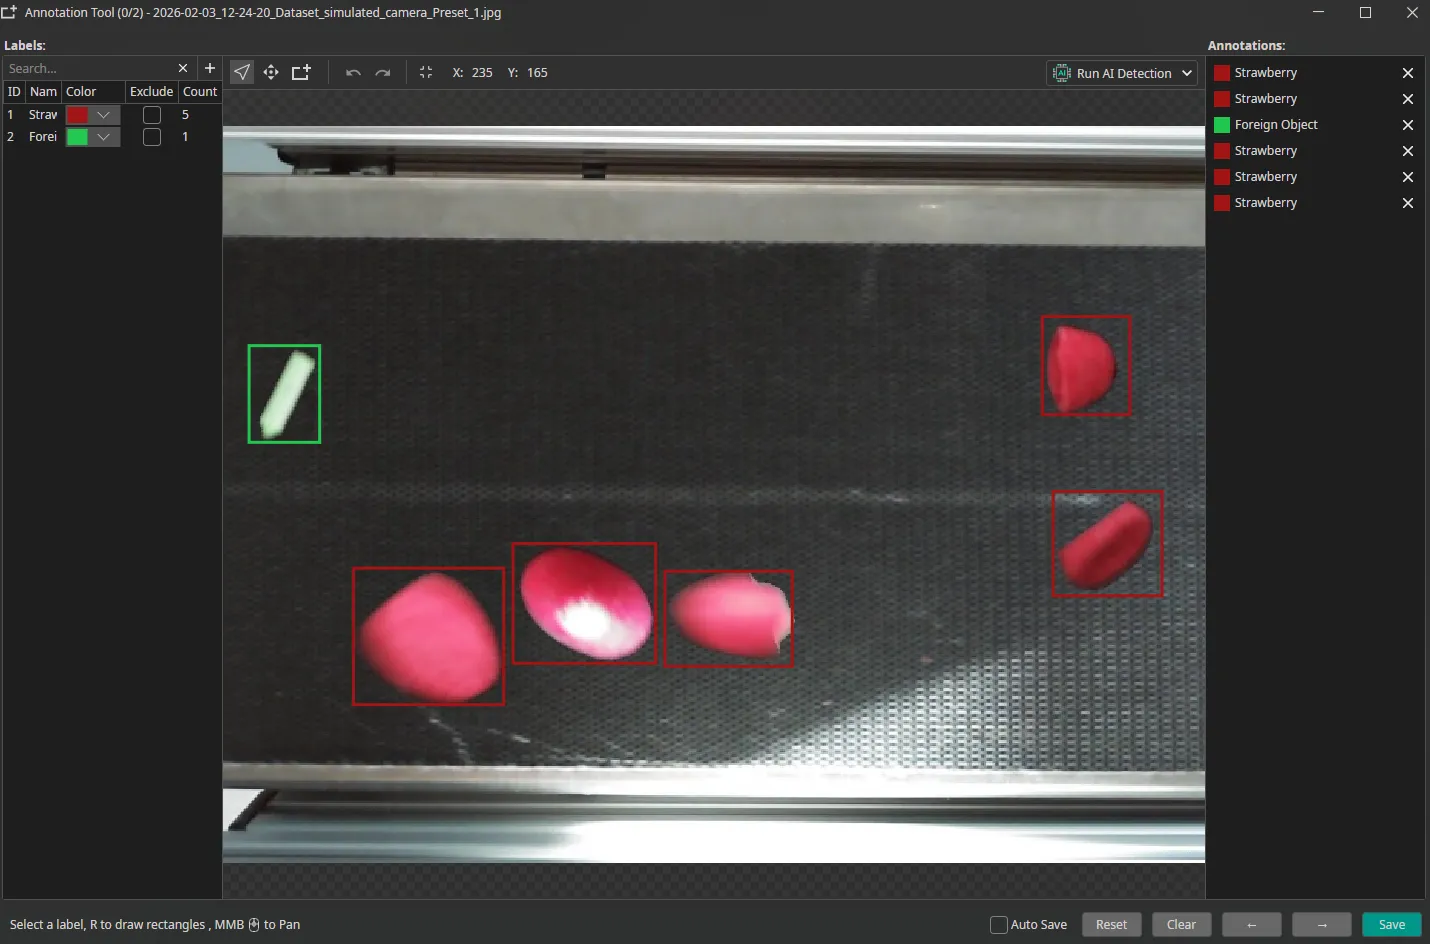
The predictions are visible in the preview and you can view them in detail in the Annotation Tool by clicking on the button next to the save icon.

Here, you can also correct any mistakes that were made by your model.
Using the camera tool as a quality control station
The Camera Tool can be used as a quality control station. To do so, you need to select an AI model like in the previous section. You can add rules that specify when an image passes the quality control.
You can use the button Add rule on the lower right of the window, to open a configuration window and add that specified rule. For each rule you can decide on which cameras and presets it is applied. After adding a new rule, you can see all rules in the table on the bottom and whether the current captures are valid as well as there are buttons to edit and delete a rule. After editing, you can press Retrigger to validate the current captures with the adapted rules.
If you want to adapt your rules to match the current captures, click the Adjust button next to that rule in the list. This automatically modifies the rule parameters (such as count ranges or area thresholds) so that all currently captured images pass validation.
Available validation rule types:
- Count: Checks the number of detected objects (e.g., minimum 1, maximum 3).
- Area: Validates the total area covered by all detections. Useful for rejecting images where objects are too small or too large.
- Weighted Count/Area: Assigns percentage weights to different label classes to calculate a weighted sum. Each detected object of a given label contributes its weight percentage to the total (e.g., "strawberry" = 100%, "raspberry" = 200%). Use when different object types should have different importance in validation thresholds and both belong to the same category (here: fruit). Example: With 3 strawberries and 1 raspberry, the weighted count = (3 × 100%) + (1 × 200%) = 5.0.
- Min Distance: Enforces minimum distance between detected objects. Useful for quality control scenarios where proper spacing is required.

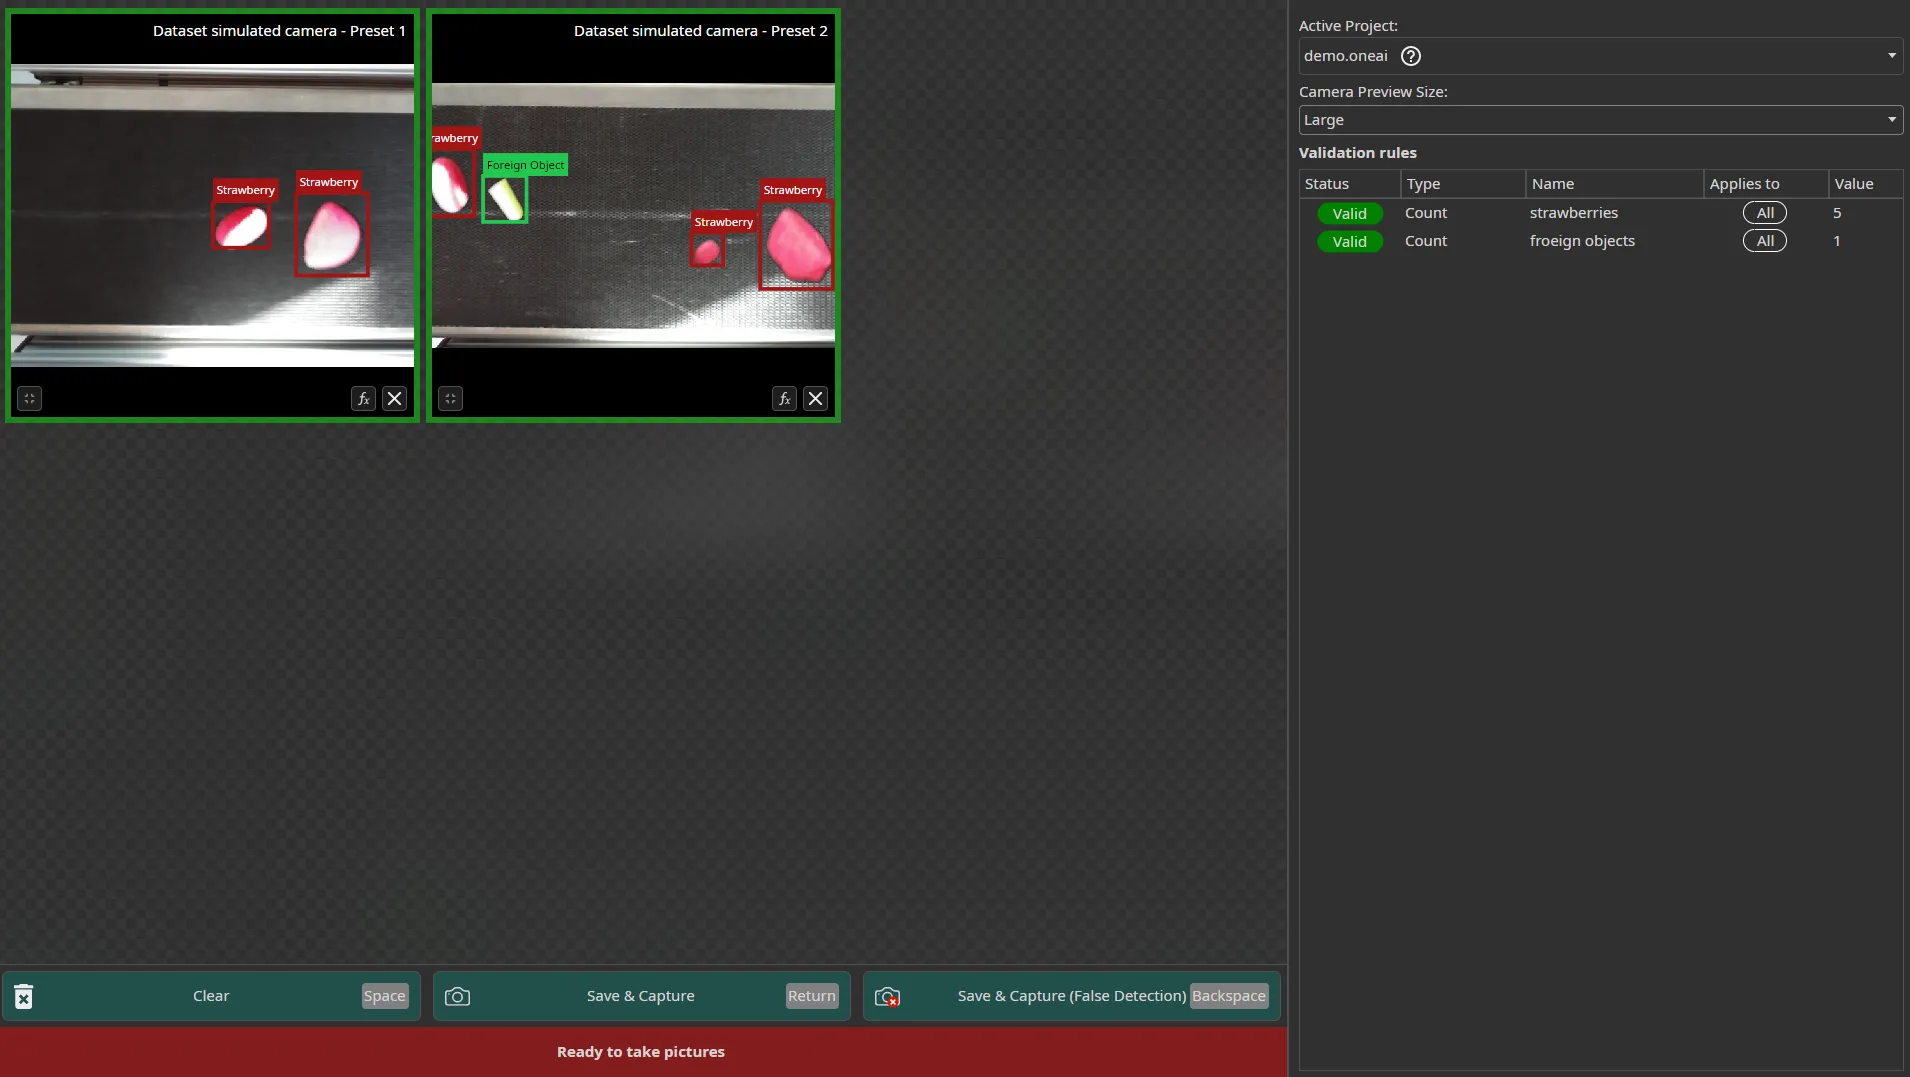
In the above image, we added the rule that an image fails the AI check if there are more than two foreign objects. If this is the case, we get a red warning.
We configured two rulesets that are applied to All Cameras instead of a single one. The rules are still validated for each image individually too which is visualised by the surrounding red/green box of an image, but the total value is written in the table Validation rules. With that, you can count objects in total over all captures but can also get details per image. By clicking on the fx button on a capture, you can see in detail which rules are valid for that specific image. In the rules overview table on the bottom, you can see the total validation.
If you want to use the AI check in a production line, you might prefer the fullscreen mode. You can access it by clicking on the icon in the top-right corner next to Enable AI Check. Here, you have hotkeys for the different actions and can view the predictions directly in the preview, e.g. the Enter button for a simple capture.
In the non-fullscreen mode you have subdirectory options a after you enabled the AI check, that you may use to sort your captures:
-
Save Subdirectory: Optional subfolder for captures that pass all validation rules (e.g., class name for organization). Images that meet all configured validation criteria are automatically sorted into this directory, helping you organize high-quality captures.
-
Save Subdirectory Fail: Captures that fail validation rules (e.g., wrong object count, insufficient area). When validation rules are configured and a capture doesn't meet the criteria, it's automatically sorted into this fail directory. This helps you separate images that don't meet quality standards, you can review them later or use them for different purposes.
-
Save Subdirectory False Detection: Images manually marked as false positives during review. This is used in the fullscreen mode where your operators can save images with false detections in a separate subdirectory for further evaluation. This allows human operators to flag problematic predictions for model improvement.